Keycloak + OAuth2‑Proxy for Ollama (Arch/Alpine, IPv6‑only)
Tech-Scroll 108, The Gatekeeper’s Parable
*A city lay in the open plain, filled with treasures of wisdom and skill. Yet its gates were unbarred, and strangers could enter without name or oath.
One day, the people set a watchman at the gate, strong and discerning, who knew each citizen by face and gave passage only to the trusted.
From that day, the treasures within were safe, and the people laboured without fear. The wise knew: it is better to guard the gates before the enemy comes, than to rebuild the walls after they have fallen.*
Introduction
This article exists to demonstrate how to place OAuth2 authentication in front of services such as HomeAssistant and Ollama—two examples of tools that often run locally without built‑in access control. Ollama, for instance, normally listens on localhost seen here as [::1] and accept requests without any authentication, making it a prime candidate for a security layer.
Rather than relying on third‑party identity providers like Google or GitHub, we’ll build our own Keycloak instance and host it ourselves. This costs nothing beyond the hardware or virtual machine it runs on—whether that’s under KVM/Libvirt, a basic VirtualBox install, or another setup entirely. Keycloak will serve as our OAuth2 provider, giving us full control over user management and access policies.
The guide is designed as a practical, repeatable build that starts from bare VMs, configures AAAA‑only access, places Keycloak behind NGINX with end‑to‑end TLS, connects it to PostgreSQL, and secures Ollama’s API using oauth2‑proxy. Along the way, we’ll intentionally break and repair components to show how recovery works.
All configuration examples are in real JSON (with some names changed to protect privacy) so readers can copy‑paste with minimal changes. Once complete, you’ll have OAuth2 in front of your chosen services, and the same approach can be extended to Apache with mod_openidc_connect and countless other applications.
A practical, repeatable build that starts from bare VMs, enables AAAA‑only access, serves Keycloak behind NGINX with end‑to‑end TLS, wires PostgreSQL, and protects an Ollama API using oauth2‑proxy. It also includes intentional break/fix flows and reset guidance.
Platforms: Arch Linux (systemd) and Alpine Linux (OpenRC).
Editors:vim.
Package managers: Arch:pacman/ Alpine:apk.
No APT here.
Network stance: IPv6‑only public edge, no inbound IPv4.
0) Topology & goals
idp.breathtechnology.co.uk→ Keycloak (Arch VM).- Keycloak listens TLS on [::1]:8443.
- NGINX does TCP stream passthrough on [::]:443 to Keycloak.
ollama.breathtechnology.co.uk→ homer (Arch host) runs oauth2‑proxy in front of Ollama[::]:11434.- DNS: AAAA record only for public v6; no A records.
- TLS: Let’s Encrypt via
certboton each host. - DB: PostgreSQL local to Keycloak host.
- Firewall: nftables; only v6:443 exposed at edge.
1) DNS (AAAA‑only)
Create AAAA records:
idp.breathtechnology.co.uk.      AAAA  2a02:8012:bc57:cafe::babe
ollama.breathtechnology.co.uk.   AAAA  2a02:8012:bc57:c0d2::babe
Ensure the host’s system hostname is not the public FQDN, to avoid nss-myhostname leaking local addresses. Example on Arch:
hostnamectl set-hostname idp-arch
vim /etc/hosts
# keep only
127.0.0.1   localhost
::1         localhost
2a02:8012:bc57:cafe::babe  idp.breathtechnology.co.uk idp
Prefer IPv6 first (glibc):
vim /etc/gai.conf
# add
precedence ::/0  100
precedence ::ffff:0:0/96  10
Disable privacy addresses & RA if using static IPv6:
# Arch & Alpine
tee /etc/sysctl.d/99-ipv6.conf >/dev/null <<'EOF'
net.ipv6.conf.all.use_tempaddr=0
net.ipv6.conf.default.use_tempaddr=0
net.ipv6.conf.all.accept_ra=0
net.ipv6.conf.default.accept_ra=0
EOF
sysctl --system
2) TLS certificates (Let’s Encrypt)
On idp and homer, obtain certificates:
Arch
pacman -Syu --noconfirm certbot
certbot certonly --standalone -d idp.breathtechnology.co.uk
Alpine
apk add certbot
certbot certonly --standalone -d idp.breathtechnology.co.uk
Certificates live under /etc/letsencrypt/live/<host>/.
3) PostgreSQL (Keycloak database)
Arch
pacman -Syu --noconfirm postgresql
sudo -iu postgres initdb -D /var/lib/postgres/data
systemctl enable --now postgresql

# Secure: SCRAM & loopback only
vim /var/lib/postgres/data/postgresql.conf
# set
listen_addresses = '127.0.0.1'
password_encryption = 'scram-sha-256'

vim /var/lib/postgres/data/pg_hba.conf

# replace rules with
local   all   all                        scram-sha-256
host    all   all   127.0.0.1/32         scram-sha-256
# (uncomment ::1 if needed)
# host all all ::1/128                   scram-sha-256
systemctl restart postgresql

# Create DB & user
sudo -iu postgres psql -c "CREATE USER keycloak WITH PASSWORD 'CHANGEME_DB';"

sudo -iu postgres psql -c "CREATE DATABASE keycloak OWNER keycloak;"

psql -h 127.0.0.1 -U keycloak -W -d keycloak -c 'select 1;'
# the result below
Password:
?column?
----------
1
(1 row)
Alpine
# --- Install & initialize (Alpine) ---
apk add postgresql16 postgresql16-openrc
rc-service postgresql initdb
rc-update add postgresql default

# --- Postgres settings: bind to IPv4 + IPv6 loopback, use SCRAM ---
# /var/lib/postgresql/16/data/postgresql.conf
sed -i \
  -e "s/^#\?listen_addresses.*/listen_addresses = '127.0.0.1,::1'/" \
  -e "s/^#\?password_encryption.*/password_encryption = 'scram-sha-256'/" \
  /var/lib/postgresql/16/data/postgresql.conf

# /var/lib/postgresql/16/data/pg_hba.conf  (replace/append these lines)
cat >/var/lib/postgresql/16/data/pg_hba.conf <<'HBA'
# Unix socket (local) connections
local   all             all                                     scram-sha-256
# IPv4 loopback
host    all             all             127.0.0.1/32            scram-sha-256
# IPv6 loopback
host    all             all             ::1/128                 scram-sha-256
HBA

# (optional, but nice to ensure ::1 resolves as localhost/localhost6)
grep -q '^::1' /etc/hosts || echo '::1   localhost localhost6' >>/etc/hosts

# Start / restart
rc-service postgresql start || rc-service postgresql restart

# --- DB & user (SCRAM) ---
sudo -iu postgres psql -v ON_ERROR_STOP=1 <<'SQL'
CREATE ROLE keycloak WITH LOGIN PASSWORD 'CHANGEME_DB';
CREATE DATABASE keycloak OWNER keycloak;
SQL

# --- Smoke tests: socket, IPv4, IPv6 ---
# Socket (no -h): will hit the 'local' rule
psql -U keycloak -d keycloak -c 'select 1;'

# IPv4 loopback
psql -h 127.0.0.1 -U keycloak -W -d keycloak -c 'select 1;'

# IPv6 loopback
psql -h ::1 -U keycloak -W -d keycloak -c 'select 1;'
4) Install Keycloak
Arch
pacman -Syu --noconfirm keycloak nginx
Alpine
apk add keycloak nginx
rc-update add keycloak default
5) Keycloak TLS on loopback + NGINX stream on 443
Copy LE certs into a Keycloak‑owned directory (both Arch/Alpine):
install -d -m 0750 -o keycloak -g keycloak /etc/keycloak/certs
install -m 0640 -o keycloak -g keycloak \
  /etc/letsencrypt/live/idp.breathtechnology.co.uk/fullchain.pem \
  /etc/keycloak/certs/fullchain.pem
install -m 0600 -o keycloak -g keycloak \
  /etc/letsencrypt/live/idp.breathtechnology.co.uk/privkey.pem \
  /etc/keycloak/certs/privkey.pem
/etc/keycloak/keycloak.conf
# Public hostnames
hostname=idp.breathtechnology.co.uk
hostname-url=https://idp.breathtechnology.co.uk
hostname-admin-url=https://idp.breathtechnology.co.uk
hostname-port=443
hostname-strict=true
hostname-strict-https=true
proxy=edge

# HTTPS only on loopback
http-enabled=false
https-host=[::1]
https-port=8443
https-certificate-file=/etc/keycloak/certs/fullchain.pem
https-certificate-key-file=/etc/keycloak/certs/privkey.pem
https-client-auth=none

# Database
db=postgres
db-url=jdbc:postgresql://[::1]:5432/keycloak
db-username=keycloak
db-password=CHANGEME_DB
cache=local
Start and confirm the listener:
# Arch
systemctl enable --now keycloak
journalctl -u keycloak -n 80 --no-pager
ss -ltnp | grep 8443    # expect [::1]:8443 or 127.0.0.1:8443

# Alpine
rc-service keycloak start
rc-service keycloak status
netstat -ntulp | grep 8443
NGINX: TCP stream passthrough on 443 (IPv6‑only)
Top‑level include in /etc/nginx/nginx.conf (outside http {}):
include /etc/nginx/stream.conf;
Create /etc/nginx/stream.conf:
stream {
  server {
    listen [::]:443 ipv6only=on;
    proxy_connect_timeout 10s;
    proxy_timeout 300s;
    proxy_pass [::1]:8443;
  }
}
HTTP→HTTPS redirect (/etc/nginx/http.d/idp-redirect.conf):
server {
  listen [::]:80 ipv6only=on;
  server_name idp.breathtechnology.co.uk;
  return 301 https://$host$request_uri;
}
Reload:
nginx -t && (systemctl restart nginx || rc-service nginx restart)
Renewal hook to sync certs into Keycloak dir
install -d /etc/letsencrypt/renewal-hooks/deploy
cat >/etc/letsencrypt/renewal-hooks/deploy/20-keycloak-copy-restart.sh <<'EOF'
#!/bin/sh
set -e
LINEAGE="$RENEWED_LINEAGE"
install -m 0640 -o keycloak -g keycloak "$LINEAGE/fullchain.pem" /etc/keycloak/certs/fullchain.pem
install -m 0600 -o keycloak -g keycloak "$LINEAGE/privkey.pem"   /etc/keycloak/certs/privkey.pem

# Arch
if command -v systemctl >/dev/null; then systemctl restart keycloak; fi

# Alpine
if command -v rc-service >/dev/null; then rc-service keycloak restart; fi
EOF

# Both
chmod +x /etc/letsencrypt/renewal-hooks/deploy/20-keycloak-copy-restart.sh
6) Bootstrap admin safely, then remove env
One‑time bootstrap via systemd/OpenRC only to create the admin, then delete the secrets.
Arch (systemd)
systemctl edit keycloak
Add:
[Service]
Environment=KEYCLOAK_ADMIN=director
Environment=KEYCLOAK_ADMIN_PASSWORD=CHANGEME_ADMIN
Apply:
systemctl daemon-reload
systemctl restart keycloak
Login with CLI and verify internal clients list includes realm-management:
kcadm.sh config credentials --server https://idp.breathtechnology.co.uk --realm master \
  --user director --password 'CHANGEME_ADMIN'

kcadm.sh get clients -r master --fields clientId | jq -r '.[].clientId' | grep -x realm-management
Remove the env from the override and restart (admin user persists inside KC):
vim /etc/systemd/system/keycloak.service.d/override.conf
# delete the two Environment= lines
systemctl daemon-reload
systemctl restart keycloak
Alpine (OpenRC)
If using the packaged service wrapper, export once and start; then unset and restart. Or set in /etc/conf.d/keycloak, start, then remove.
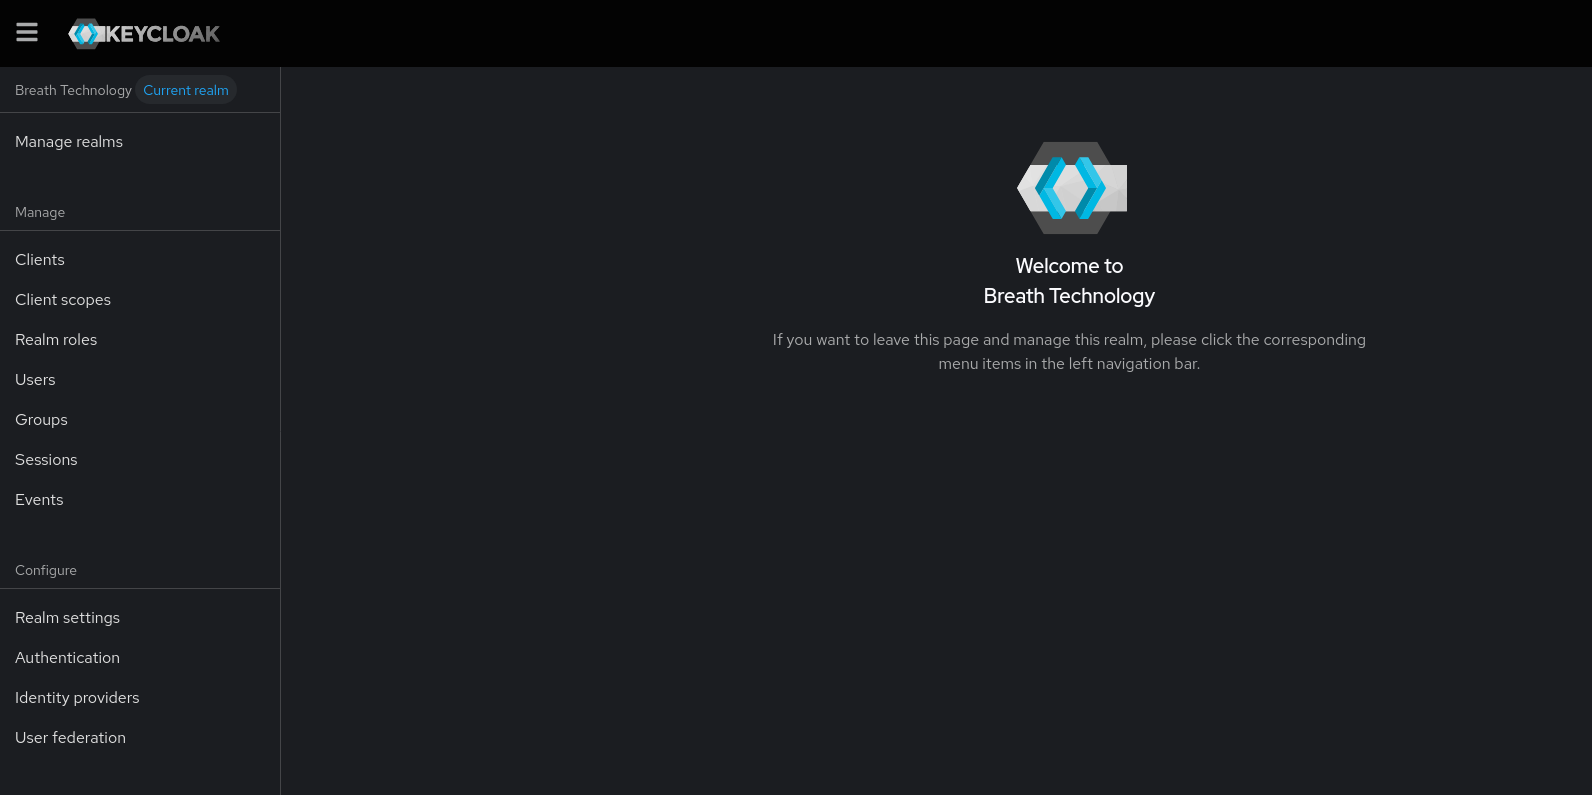
7) Create a realm for the domain (JSON import)
Create /home/director/breath-realm.json:
Below you see an actual tested working JSON Realm file.
{
  "realm": "breath",
  "enabled": true,
  "displayName": "Breath Technology",
  "sslRequired": "all",
  "attributes": {
    "frontendUrl": "https://idp.breathtechnology.co.uk/realms/breath",
    "adminTheme": "keycloak.v2",
    "loginTheme": "keycloak.v2"
  },
  "internationalizationEnabled": true,
  "supportedLocales": ["en"],
  "defaultLocale": "en",
  "bruteForceProtected": true,
  "failureFactor": 5,
  "maxFailureWaitSeconds": 900,
  "waitIncrementSeconds": 60,
  "loginWithEmailAllowed": true,
  "registrationAllowed": false,
  "verifyEmail": false,
  "accessTokenLifespan": 1800,
  "ssoSessionIdleTimeout": 36000,
  "ssoSessionMaxLifespan": 86400,
  "clients": [
    {
      "clientId": "director",
      "protocol": "openid-connect",
      "publicClient": false,
      "serviceAccountsEnabled": true,
      "standardFlowEnabled": true,
      "directAccessGrantsEnabled": false,
      "rootUrl": "https://homer.breathtechnology.co.uk",
      "redirectUris": ["https://homer.breathtechnology.co.uk/*"],
      "webOrigins": ["https://homer.breathtechnology.co.uk"],
      "attributes": {
        "pkce.code.challenge.method": "S256",
        "post.logout.redirect.uris": "+"
      }
    },
    {
      "clientId": "ollama-gw",
      "protocol": "openid-connect",
      "publicClient": false,
      "serviceAccountsEnabled": true,
      "standardFlowEnabled": true,
      "directAccessGrantsEnabled": false,
      "rootUrl": "https://ollama.breathtechnology.co.uk",
      "redirectUris": [
        "https://ollama.breathtechnology.co.uk/*",
        "https://*.breathtechnology.co.uk/oauth2/callback"
      ],
      "webOrigins": ["https://ollama.breathtechnology.co.uk"],
      "attributes": {
        "pkce.code.challenge.method": "S256",
        "post.logout.redirect.uris": "+"
      }
    },
    {
      "clientId": "ha-bridge",
      "protocol": "openid-connect",
      "publicClient": true,
      "standardFlowEnabled": true,
      "implicitFlowEnabled": false,
      "directAccessGrantsEnabled": false,
      "rootUrl": "https://ha-bridge.breathtechnology.co.uk",
      "redirectUris": ["https://ha-bridge.breathtechnology.co.uk/*"],
      "webOrigins": ["https://ha-bridge.breathtechnology.co.uk"],
      "attributes": {
        "pkce.code.challenge.method": "S256",
        "post.logout.redirect.uris": "+"
      }
    }
  ],
  "clientScopes": [
    { "name": "roles",   "protocol": "openid-connect" },
    { "name": "profile", "protocol": "openid-connect" },
    { "name": "email",   "protocol": "openid-connect" },
    { "name": "microprofile-jwt", "protocol": "openid-connect" }
  ],
  "defaultDefaultClientScopes": ["roles", "profile", "email"],
  "defaultOptionalClientScopes": ["microprofile-jwt"],
  "roles": {
    "realm": [
      { "name": "admin", "description": "Realm admin for Breath" },
      { "name": "user",  "description": "Standard user" }
    ]
  }
}
Import and verify:
kcadm.sh config credentials --server https://idp.breathtechnology.co.uk --realm master \
  --user director --password 'CHANGEME_ADMIN'

kcadm.sh create realms -f /home/director/breath-realm.json
curl -sS https://idp.breathtechnology.co.uk/realms/breath/.well-known/openid-configuration | jq .issuer
# expect: "https://idp.breathtechnology.co.uk/realms/breath"
Add an admins group with console rights inside mygroup:
GID=$(kcadm.sh create groups -r mygroup -s name=admins -i)
RMID=$(kcadm.sh get clients -r mygroup --fields id,clientId | jq -r '.[] | select(.clientId=="realm-management") | .id')
kcadm.sh add-roles -r breath --gid "$GID" --cid "$RMID" --rolename realm-admin
Add users to the group as needed and head over to KEYCLOAK and see the new Realm
8) Protect Ollama with oauth2‑proxy (homer, Arch)
Install & configure:
Do this on your Ollama host, this becomes your access point to access ollama's API once you have run ollama pull gpt-oss:20b and then ollama serve
For those who have not tried gpt-oss yet, head over here and have a look, its a pretty cool GPT5 based GPT, it works and functions just like ChatGPT5 while you do need ideally a 16GB Nvidia video card it runs acceptably on an RTX3060 12GB LINK
pacman -Syu --noconfirm oauth2-proxy nginx

install -d -m 0750 /etc/oauth2-proxy
cat >/etc/oauth2-proxy/ollama.conf <<'EOF'
provider = "oidc"
oidc_issuer_url = "https://idp.breathtechnology.co.uk/realms/breath"
email_domains = [ "*" ]

client_id = "ollama-gw"
client_secret = "CHANGEME_OIDC_SECRET"
cookie_secret = "CHANGEME_32BYTE_BASE64_OR_HEX"

reverse_proxy = true
upstreams = [ "http://[::1]:11434" ]
http_address = "[::1]:4180"

cookie_secure = true
cookie_samesite = "lax"
set_xauthrequest = true
pass_user_headers = true
pass_authorization_header = true
silence_ping_logging = true
EOF

# systemd override to run this config
systemctl edit oauth2-proxy
# add
# [Service]
# ExecStart=
# ExecStart=/usr/bin/oauth2-proxy --config /etc/oauth2-proxy/ollama.conf

systemctl daemon-reload
systemctl enable --now oauth2-proxy
NGINX vhost for ollama.breathtechnology.co.uk:
# /etc/nginx/http.d/ollama.conf
limit_req_zone $binary_remote_addr zone=rl_ollama:10m rate=5r/s;

server {
  listen [::]:80 ipv6only=on;
  server_name ollama.breathtechnology.co.uk;
  return 301 https://$host$request_uri;
}

server {
  listen [::]:443 ssl ipv6only=on;
  server_name ollama.breathtechnology.co.uk;

  ssl_certificate     /etc/letsencrypt/live/ollama.breathtechnology.co.uk/fullchain.pem;
  ssl_certificate_key /etc/letsencrypt/live/ollama.breathtechnology.co.uk/privkey.pem;

  # oauth2-proxy endpoints
  location = /oauth2/auth { proxy_pass http://[::1]:4180/oauth2/auth; proxy_set_header X-Forwarded-Uri $request_uri; }
  location /oauth2/      { proxy_pass http://[::1]:4180; }

  location / {
    limit_req zone=rl_ollama burst=20 nodelay;

    auth_request /oauth2/auth;

    proxy_set_header X-Forwarded-Host  $host;
    proxy_set_header X-Forwarded-Proto $scheme;
    proxy_set_header X-Forwarded-Uri   $request_uri;
    proxy_set_header X-Real-IP         $remote_addr;

    # pass identity to upstream if desired
    auth_request_set $user $upstream_http_x_auth_request_user;
    proxy_set_header X-User $user;

    proxy_pass http://[::1]:4180;  # oauth2-proxy forwards to Ollama
  }
}
Reload:
nginx -t && systemctl restart nginx
Get the client secret for ollama-gw and place into the config:
CID=$(kcadm.sh get clients -r myclients -q clientId=ollama-gw --fields id --format csv --noquotes)
kcadm.sh get clients/$CID/client-secret -r myclients
vim /etc/oauth2-proxy/ollama.conf   # set client_secret, cookie_secret
systemctl restart oauth2-proxy
9) nftables (IPv6 edge sketch)
table inet filter {
  chain input {
    type filter hook input priority 0;
    iifname "eth0" ip6 daddr 2a02:8012:bc57:cafe::babe tcp dport {443} accept
    iifname "eth0" ip6 daddr 2a02:8012:bc57:cafe::babe drop comment "drop rest to idp"
  }
}
Adjust interface/address as needed. Add logging/rate limits to taste.
10) Backups & exports
PostgreSQL:
install -d -m 0700 /root/pgdumps
sudo -iu postgres pg_dump -Fc keycloak > /root/pgdumps/keycloak-$(date +%F).dump
Keycloak realm export: (from Admin Console → Export), or CLI:
# master realm export (example)
# kcadm has limited export; prefer console or kc.sh export in maintenance window
Keep copies of:
/etc/keycloak/keycloak.conf/etc/nginx/nginx.conf,/etc/nginx/stream.conf,/etc/nginx/http.d/*.conf/etc/systemd/system/keycloak.service.d/override.conf(no passwords left inside)
11) Troubleshooting (field‑tested)
- Issuer shows
http://or includes:8443: set inkeycloak.conf:hostname,hostname-url,hostname-admin-url→https://idp...hostname-port=443proxy=edge,hostname-strict=true,hostname-strict-https=true
- CSP / 3p-cookies iframe errors: ensure full HTTPS path via NGINX stream; do not add conflicting CSP headers in NGINX. Keycloak emits its own CSP.
- 400/
SSL_ERROR_RX_RECORD_TOO_LONG: browser hitting TLS on a plain HTTP listener. Use stream passthrough to KC TLS. Ensurehttp-enabled=falseandstreamproxies to 8443. - Connection refused to 443: verify NGINX stream is listening
[::]:443and KC is on127.0.0.1:8443. - Name resolves to 172.17.x or fe80:: fix
/etc/hosts, avoid FQDN as system hostname, prefer IPv6 in/etc/gai.conf. - Keycloak won’t bind 8443: file perms/paths for certs; copy certs to
/etc/keycloak/certs/owned bykeycloak. - Locked out of admin: add temporary
KEYCLOAK_ADMINenv, restart, login, grant roles, then remove env and restart. - Hard reset: stop KC,
dropdb keycloak; createdb keycloak -O keycloak, restart KC with bootstrap env.
12) What to rotate after first login
- Replace all
CHANGEME_…secrets. - Create a second break‑glass admin and store offline.
- Wire SMTP and enable email verification if desired.
- Tighten token and session lifetimes per app requirements.
13) Appendix – Quick smoke tests
# Keycloak health (management interface)
curl -sS http://[::1]:9000/health/ready

# Discovery
curl -sS https://idp.breathtechnology.co.uk/realms/breath/.well-known/openid-configuration | jq .issuer

# oauth2-proxy
curl -I https://ollama.breathtechnology.co.uk/
# expect 401 → redirect to IdP; after login, 200 through to Ollama
Result: a lean, IPv6‑first, reproducible Keycloak deployment on Arch/Alpine, fronted by NGINX with end‑to‑end TLS, backed by PostgreSQL, and used as an internal IdP to secure an Ollama API via oauth2‑proxy.